Getting rid of all Xiaomi M365 stem wobble and creak
UPDATED: Oct 9 2018
To get a really satisfying feel to your scooter, nothing beats feeling the whole weight of it under your handlebars without any extra teetering. Giving it a slight wiggle front-to-back shouldn't produce any squeaking or rubbing sounds. Those sounds would be loose aluminum parts rubbing together. Again we address design shortcomings in four relatively easy points that I found eliminated all handlebar shaking or clunking noises on my M365.
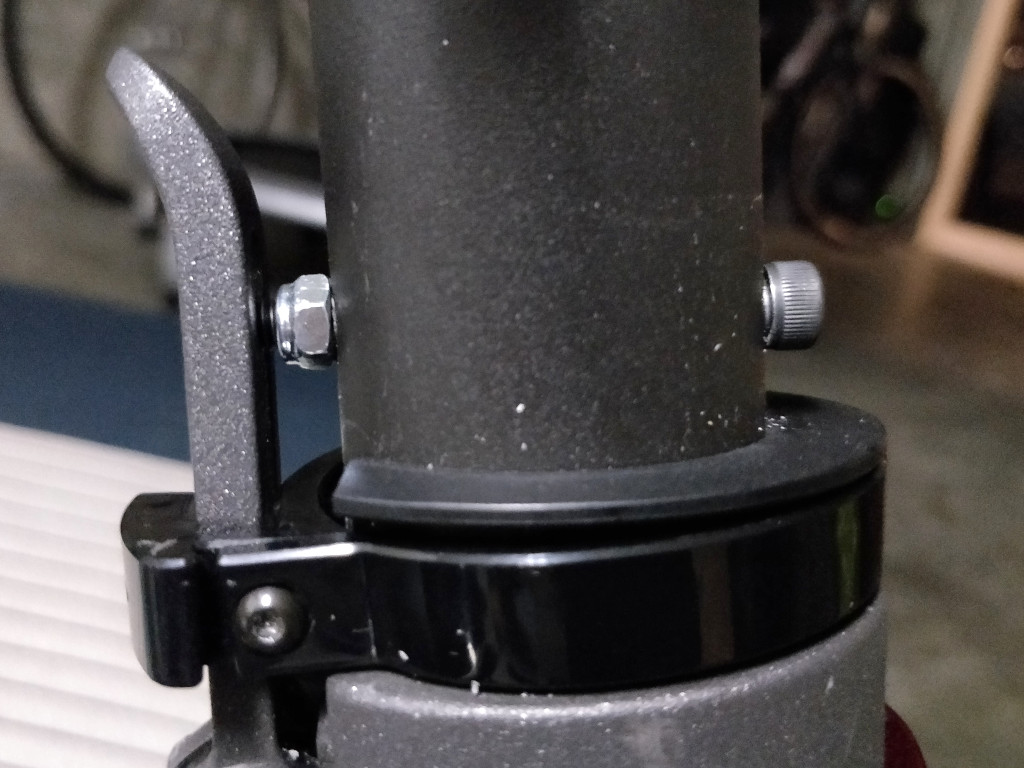
Tighten the hook bolt
The first thing to check is always a loose locking hook. If your mechanism isn't tight enough, the whole thing will rock slightly front to back. That play puts excessive strain on the hook and will eventually crack it which is why it's so important to reinforce it before proceeding. Not only are these parts stronger, but they also prevent the mechanism from loosening as fast over time with regular use.
With the mechanism open, work through the following steps to make this adjustment:
Loosen but don't remove bolt going through the hook.
Loosen the two nuts inside the mechanism. These control the actual tightness of the hook. Move both inward or outward depending on how loose or tight the lever feels when you try to lock it.
Re-tighten the two nuts and tighten the outer bolt going through the hook.
Close the mechanism and try out the tightness. You want to feel a decent amount of resistance but not so much that you really have to put your arm into it.
Repeat the whole process until it feels just right.
Note that an improved hook initially needs some break-in, and light scraping of aluminum where it contacts the notch is normal. I found it's helpful to put some pressure on the lever while moving the stem up to lock it, before the hook makes contact. That avoids some of this rubbing and helps the hook get past that ridge so it locks cleanly. Otherwise, sometimes it doesn't make it which prevents the lever from completely closing.
Get a vibration dampener pad
These 3D printed plastic dampeners may seem gimmicky but they are in fact a necessity. They are pretty cheap, I would check eBay or other M365 independent stores. Double stick tape helps secure it and installation is plug 'n play.
Tighten the handlebars
There are two screws on each side where the head unit inserts into the stem which you used to mount the handlebars after unboxing. They tend to require periodic re-tightening. Unfortunately there can sometimes still be play even when tightened all the way, in which case a bolt coating product such as Threadlocker may firm it up.
Additionally, there are three screws fastening the actual bar to the head unit. Although they live behind the built-in headlight, they're easy to get to. The headlight has a screw on the top and bottom of it. Access the top screw by unsticking and temporarily removing the top plastic pane of the head unit's faceplate. The bottom screw is always exposed. Once removed, you can gently reorient the light to the side to access and tighten the three metric bolts underneath.
Secure the connection above the locking mechanism
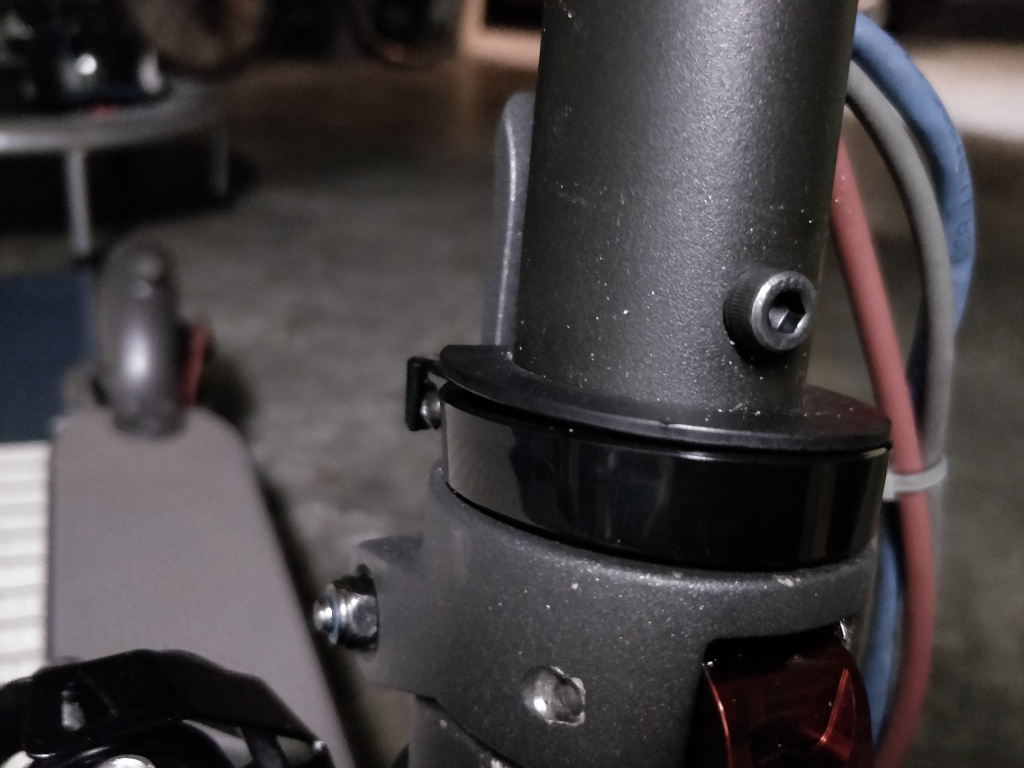
Now, for the real project. This is the extra mile that really takes care of any and all remaining wobble or creaking. You've given enough love to the locking mechanism, but turns out it's only half the battle. The connection to the stem, just above, is almost surely your source of any extra play or creak. This issue is extremely common in the M365 community. Although it has inspired a variety of fixes, many ride with it loose and risk injury.
The stem is slid into a post and held together by a steel pin and a small screw. Given how much pressure is on this connection, the diagnosis is that this pin continuously loosens itself out and runs into the plastic lever collar (that black circular thing that keeps the lever in place). Any glue put in by the factory also eventually fails.
So first off, I suggest removing the steel pin since we will secure everything a better way. Punch it inward with a punch around 3-5mm, and it will simply drop out of the bottom.
Then, to solidify the connection, you can either install a bolt or apply some epoxy for metal applications (or both). The usual disclaimer— this is as DIY as you can get and there are absolutely no guarantees about safety and stability. That said, this is tried 'n tested in the modding community, and has worked pretty fantastically for me. Proceed at your own risk.
To me the bolt solution is cleaner because you don't have to mess with nasty chemicals. However, I found that while the bolt greatly reduced wobble, it only silenced the creak for a few months. I then put in epoxy which silenced it again. Time will tell if the epoxy solution is permanent enough. Doing both seems like the best option as you get the strength of the bolt and the silence from the epoxy.
Whether one comes before the other should not matter. You can try one out and always follow up with the other. In retrospect I also believe both methods are about equivalent in difficulty.
Installing a bolt
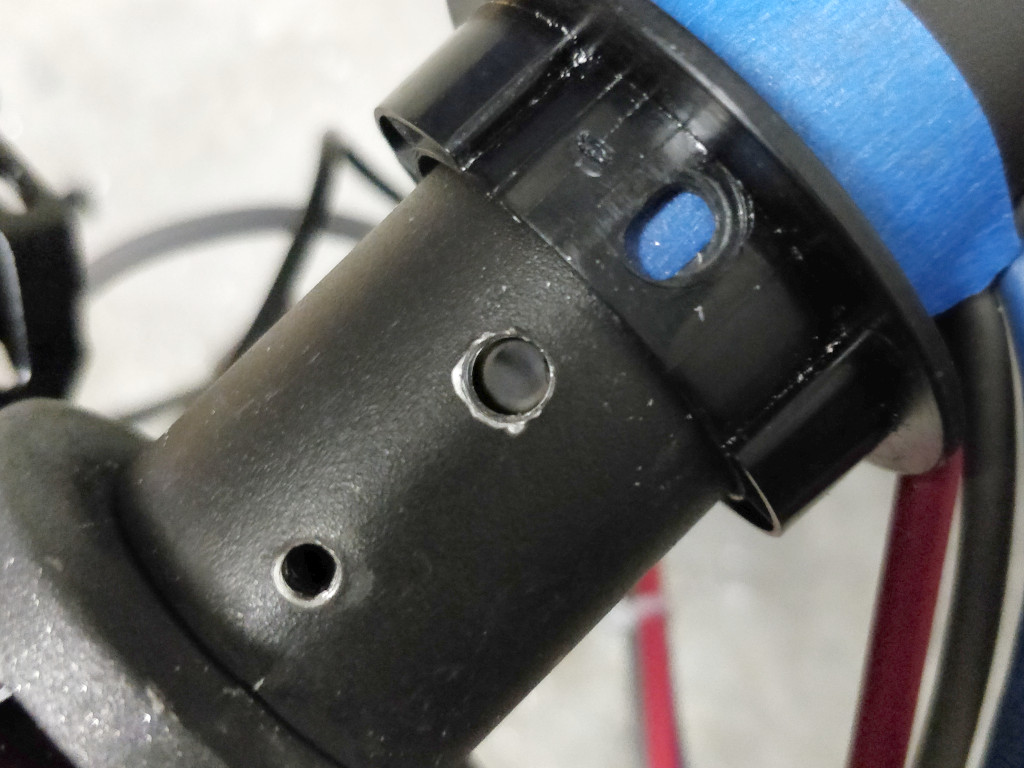
This method is drilling a hole front-to-back through the stem and an installing a M5 or M6 x 50mm bolt. You could repurpose the factory-drilled hole that preivously held the steel pin, but that would require relocating the lever collar and re-drilling a hole for its screw. I recommend drilling your own hole above the collar.
 |
 |
I chose a black socket cap bolt for aesthetics and a nylon lock nut. I wanted the bolt head in the front as it looks better than a nut. Center the hole as close as possible so that the nut and tip of the threading fits in that gap in the locking lever. Also note there is clearance for the nut between the lever and the stem— the lever does not sit flush with the stem when locked.
To prepare to drill, I suggest folding the stem so you are drilling downward, and marking the center before drilling. I measured the post at 44.5mm high from the top flat part of the upper half of the mechanism. The center of my hole ended up at 25mm from that flat part.
Line up the stem top-to-bottom by putting in the lever collar's screw. Make sure the stem base is flush with the locking mechanism.
Use the right bit size for the bolt. If you went with an M6 bolt, use an M6 bit. Any play in the bolt will just lead to creaking and wobbling again, although if you're applying epoxy too it might not matter as much.
Carefully drill as straight and centered as you can completely through the stem. This creates holes on both sides of the hollow stem and the thick aluminum post under it.
 |
 |
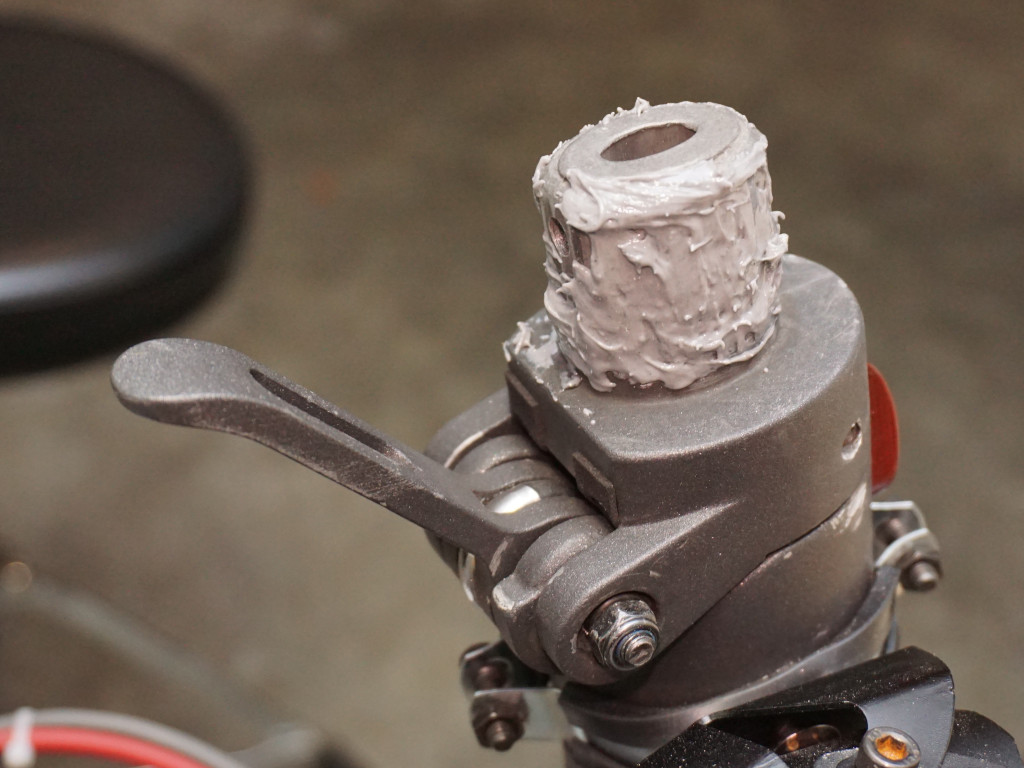
Applying epoxy
This solution is popping off the stem from the post, coating it with epoxy, and sliding it back in which leaves a thin layer of epoxy between the two parts.
First off, buy metal-grade epoxy. Your local hardware store definitely has one. I went with Loctite's Metal and Concrete Epoxy in a syringe.
To reveal the post, you of course need to punch the pin out (see above) and unscrew the small collar screw. Then gently rock the stem back and forth to work it up and out.
 |
 |
For best results, I suggest sanding the post and inner part of tube pretty well. Reveal as much bare aluminum as you can. I also used a dry cloth to remove some dust and debris.
When you're ready to start the 10 minute timer to when the epoxy hardens, mix it. You only need a few squeezes worth. Coat the post.
At first I was a little concerned about how it would bunch up at the bottom after sliding the post back on. I'm no expert with epoxy, but in my observation the characteristics of the final solution make it easy to crack off with a flathead screwdriver. Plus, the collar goes right there anyway and hides any extra bits.
That should smooth out all of the noises. Any more should just be a matter of the tightness of your locking mechanism.