Reinforcing the Defective Xiaomi M365 Stem Lock
 |
 |
 |
 |
The M365 is an impressive scooter, but it can't be perfect. The build quality is excellent with the important exception of the locking mechanism. The design is awful and the parts are weak. After a short period of time it broke while I was riding it and could have seriously hurt me.
Since I first wrote this article Xiaomi has tried to address this issue. Scooters manufactured after a certain point in 2019 have a steel hook. Many report that an easy test is to hold a magnet to the part, which should stick. If it doesn't, you need your own aftermarket hook. Also note that nothing prevents you from getting sent old stock. Just because you are buying the scooter now doesn't mean it also was manufactured recently. I have seen a couple of scooters purchased in August of 2019 that were made in October of 2018.
The hook is just one of three parts that can fail. Even with a steel hook, I personally would not trust the other two parts in the mechanism for daily riding based on various reports of breakage around the community. They are easy to replace and not very expensive for a far reduced chance of any kind of mid-ride failure.
While scooter share companies replace the whole mechanism with a metal collar to eliminate the issue entirely, you still want to be able to carry the scooter on public transport or into a store, or perhaps throw it in a trunk. For this reason I think it's worth it to order some aftermarket parts and strengthen the connection permanently.
Here are some good replacements as well as an easy method to remove the hook pin.
Points of Failure and Replacement Parts
The following components all require some TLC. Note that those of us in the United States have to send away overseas for this stuff. While our cities are no exception to the scooter boom, the modding scene lives largely in Europe. I recommend buying from indivual specialists but you can also find decent parts on eBay. For these mission-critical items, I would avoid direct Chinese replacements.
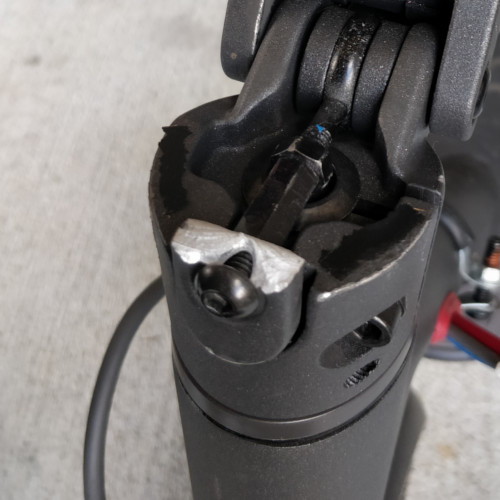
Hook (photo above left) - What locks into the groove and visible from the front of the scooter. Has a bolt head in the middle. As you can see, it is prone to shearing in half here.
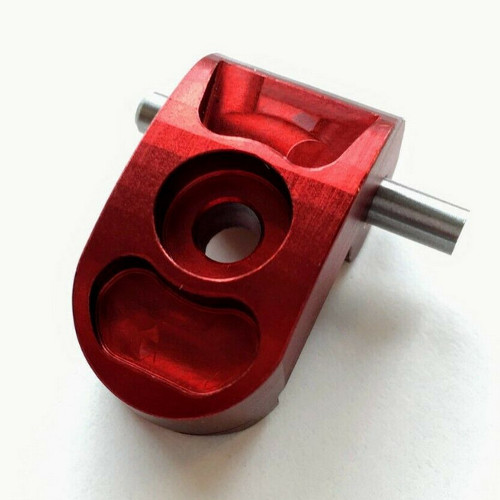
The Vilda Shop has a fantastic replacement that is among the best improved hook you can get. They are also generally sold on eBay along with the stock version: eBay Search Results
Hook bolt, large fisheye bolt, or the 'jesus bolt' as it bears the pressure of the locking lever connected to the hook...which secures the whole thing. So it's a hidden but critical part.
Again Vilda has a great part.
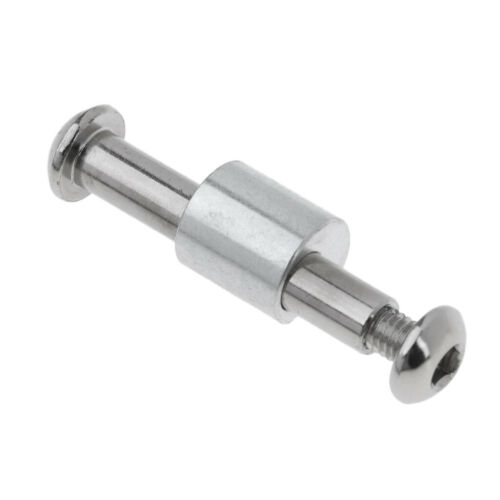
Axis/hinge bolt (photo above right) - What the whole stem pivots on. Not the best design as it breaks at the groove in the middle. Find a replacement that is **one thick bar all the way through**. There are lots of replacements sold on eBay and the like, and they are NOT actually improvements despite claiming to be "hardened" or "strengthened." Make sure you find one without grooves or indents.
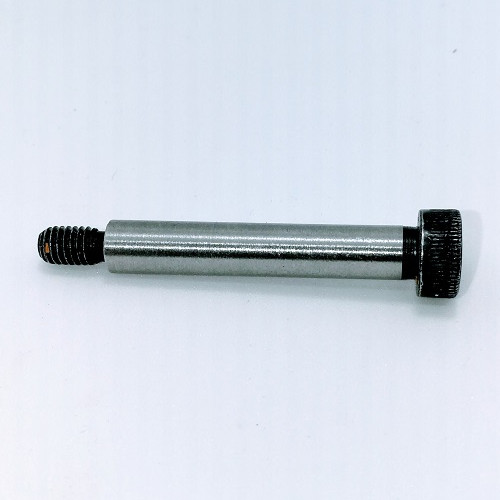
I personally like using a generic shoulder bolt as an improved replacement part, secured with a washer and lock nut. The most correct size I've found is an M6 (8mm) bolt with a 45mm shoulder (the long unthreaded part). I use these ones on AliExpress in both of my M365s (M6 / L is 45mm).
There is a common Chinese model such as this eBay Product, but a French modder has produced a better one found at his M365 store. Vilda also has a good one.
If you look hard enough, you can find combo packs with everything you need.
Installation
Replacing each of these parts is mostly pretty self-explanatory. Obviously you'll disassemble the whole mechanism, unscrewing and extracting each part.
The axis bolt is a straight swap-out. The fisheye bolt is too, however note you'll gently punch out the half-circle shaped metal inner part of the lever. If the replacement doesn't want to go in, you can try and cut away at the aluminum. Just be gentle.
The hook requires special attention as it's pretty hard to get out. You may have found it doesn't even budge with a hammer and punch alone. I suggest drilling holes to loosen it.
Tools needed:
- Hammer
- 5mm punch
- Drill
- 5mm (around 3/16") drill bit
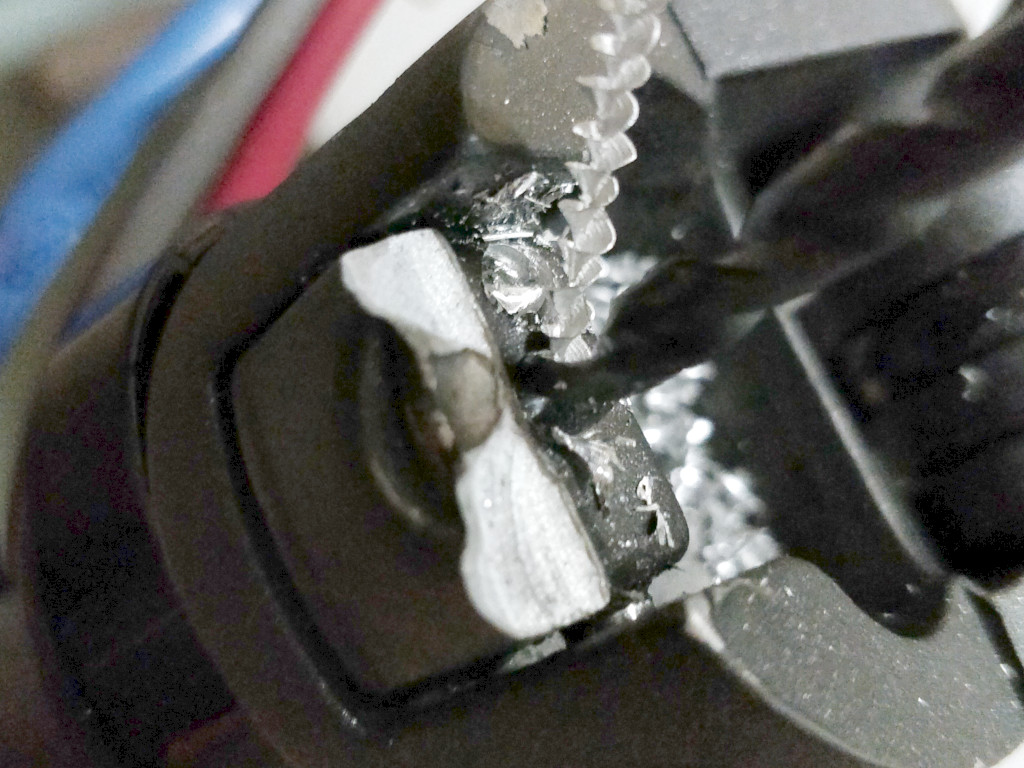
Prop the front of the scooter up on a bench or something and anchor the back wheel against the floor. The goal is to have downward momentum on the hook. Then drill 3 holes into the hook directly inline with the pin.
 |
 |
Aim to drill into the aluminum and not the steel pin. You can hit the pin but stop as soon as you can. Don't go all the way through it. Even though the improved hook designs all come with a new pin anyway, keep the old one in tact so you don't have to remove in pieces which is messy and more difficult.
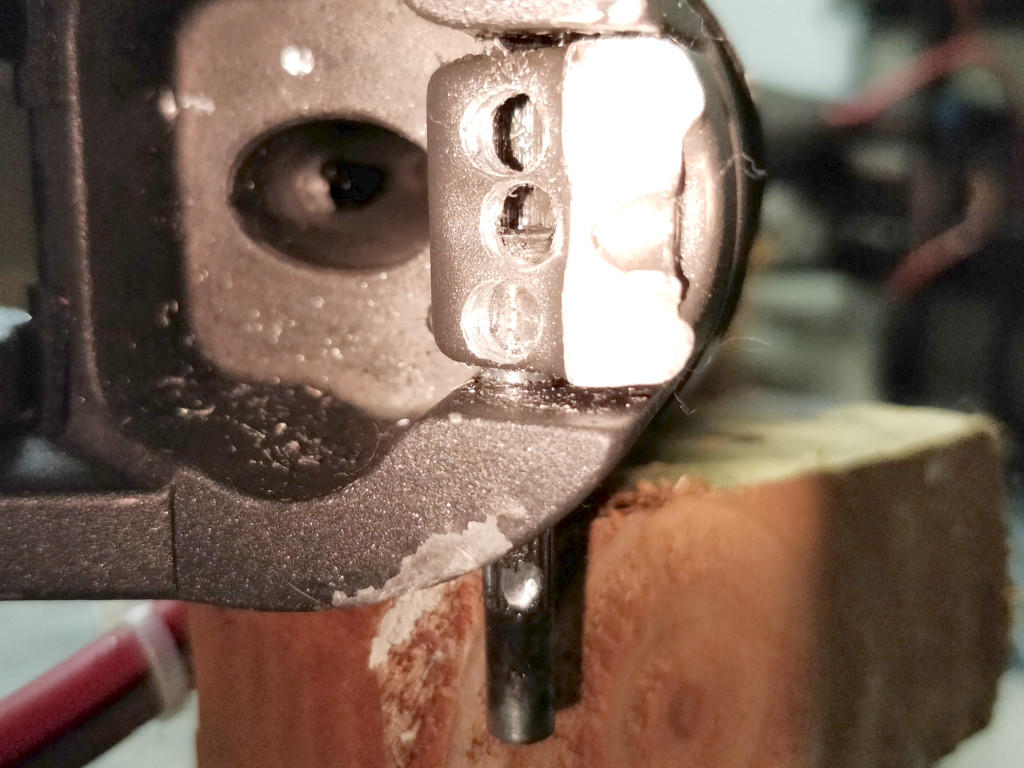
With your holes drilled, another pass with the punch should take it out without issue. Prop up the base of the stem with a wood block and hammer it on a hard surface such as concrete. Avoid supporting the part you're striking with any other part of the stem, or you may damage it. I used a small block of wood to provide good support directly under where I was hitting.
Take note that the pin slightly tapers on one side. I found the pin was inserted from the left side, facing forwards on the scooter. That means you'll want to strike from the right side. If you look carefully at each pin end, you will notice one is slightly smaller than the other. That's the side you want to pound. See the photo of this pin above.
With the old (hopefully not broken) hook extracted, it's only now a matter of putting the new hook in place, lightly tapping the pin in, and tightening its set screw.
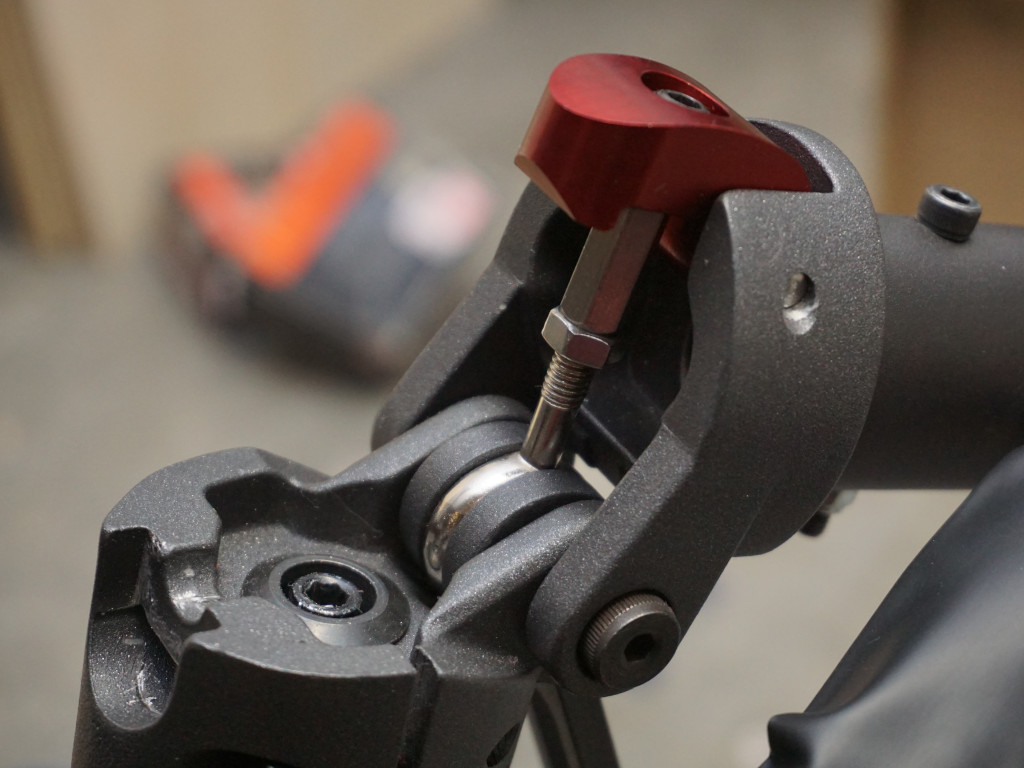
And that should do it. This is what one of my fresh installations looks like.